
I’m very excited today because my boyfriend, the photographer behind Mister Scheimpflug, is sharing a bit of his camera wisdom today. Product photography is something all of us struggle with. Yes, I admit that I do as well, which is why I generally bribe him with cookies to do my shoots. I think you’ll really enjoy this post on three things that trip up a lot of product makers.
Allowing your customer to have first-hand experience with a product is a great way to sell it. Your customer can immediately answer many questions when they see something in person. They quickly learn what it looks like, how big it is, how it feels, and if it fits their lifestyle. That is why stores allow you to try things on, car dealers insist you take a test drive, and furniture stores ask you to try out all the chairs. When you are selling online, product photos have to take the place of that vital first-hand experience. Photographs have to be clear to reveal all the important information that will convince someone to buy it without seeing it in person. But I often see photos that make it tough for people to get a true sense of the product that is for sale.
Here are a few of the things that I see when looking through online shops:
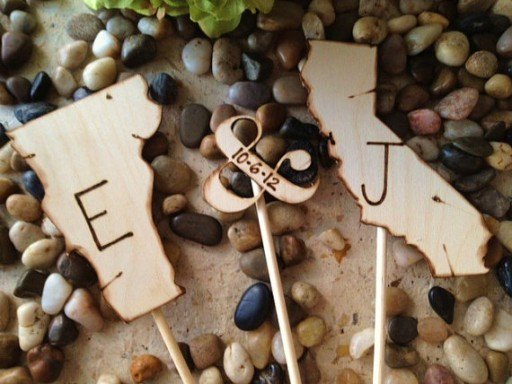
Distracting backgrounds – A distracting background can make it hard to get a good look at the product. Perhaps it blends in too much and is hard to distinguish from the backdrop. In some photos, the product simply does not make sense in the environment where it is shown. Wedding cake toppers belong with beautiful cakes and fancy table settings. So why would you photograph them lying in gravel? Clean simple backdrops show the product best. If it is something that belongs in a specific environment show it there. Just be sure to keep it simple to let your product shine.
Technical problems – Photos that have technical problems do not belong in your shop. Period. If your photo is way too light or dark or out of focus, it is best to reshoot. If there are technical problems with the image, it can be hard to get a sense of the product, especially the details. Good, accurate colors also go a long way to help your product sell. After all, you don’t want your customer to order a sweater that appears green in pictures but when it arrives it is actually turquoise (this has happened to me). You’ll have a return on your hands and possibly a very unhappy customer. This is also why you would want to avoid Instagram-style filters on your photographs. Although they may be fun, they alter images too much to give an accurate sense of the product. It is also important to properly size images so they are not pixelated because the details of an object are hard to see when pixels get in your way.
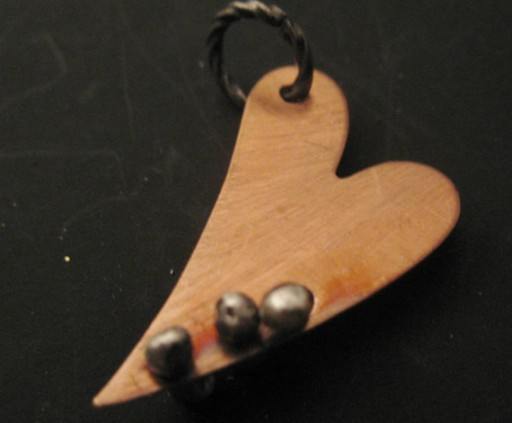 This pendant by Molly Heltsley is probably stunning in person but with an out-of-focus picture, it’s hard to see its true beauty.
Teeny tiny product – In some photos, the item being sold is absolutely tiny. You can’t get a sense of the product if it is too small to see. If the product takes up less than an eighth of the image, it is simply too small. Try getting closer and filling more of the image with the product. You made it, so why wouldn’t you want to show it off in all of its glorious detail. Let the item fill the photograph. That way it will fill the computer screen and, in turn, your potential customer’s eye.

These earrings by Zooz Jewelry are, in their defense, teeny tiny but you still want your customers to be able to see them in your photographs.
Want to learn how to take professional product photography without hiring a photographer or spending tons of money on equipment? I’m leading an online course in Essential Product Photography next month that will teach you how to set up a small space to shoot, which (inexpensive) lights to buy to get a professional look, and how to arrange your shot to display your product to its fullest potential. The best part is that you will learn how to take professional looking product shots with the camera you already own for much, much less than my 8 years of photography education cost me, I can assure you. The class starts soon so sign up fast!
Great tips! Product photography can be so difficult, especially with small items like the jewellery I make. I’ll be taking on these tips for sure to improve my product photos! Thanks.
Any suggestions for shooting photos with models? I am feeling pretty good with my product photography but I am daunted by pix with people!
A couple of quick tip for working with models:
1. Practice on yourself first using the self timer. Experiment with poses. Get the lighting and composition right before your model arrives.
2. Clearly direct your model. Coach them and show them what you want. If you don’t get what you are looking for try working with someone else.
I’ve taught myself to do a lot with my product shots but could always stand to learn more. I didn’t see a price for the online tutorial. Could you let me know before signing up what the cost will be?
My biggest problem is accessing natural light here in the dark and dreary northwest. Even when I shoot near a window I get two colors on a large product: the indoor color and the natural light color, making the product look like it’s not uniform. Could you suggest sources of indoor lighting that don’t give that yellow cast?
I am glad you are asking about balancing outdoor light with indoor light. This is a tricky lighting situation and is hard to solve the differences in the colors of light, it is easiest to try to make them match.
One option is to turn off the indoor lights and use a big reflector, placed opposite of the window, to fill in where in the indoor light would have.
The other option is to replace the indoor lights with fluorescent lights that are balanced for daylight. You should be able to find them at your local hardware store or through a photo equipment supplier. Look for CFL bulbs with a standard base and a color temperature of 5500K-6500k.
I have updated the product page for the Essential Product Photography course with the price.
Very helpful… thank you very much! 🙂